How to connect a laptop to a Synetech interactive screen display
9 February 2026
- Turn on the power strip located at the back of the screen.
 Turn on the interactive screen using the power button located on the lower right front panel.
 Note: If the screen does not turn on, check that the switch located at the back of the device is turned on.
-
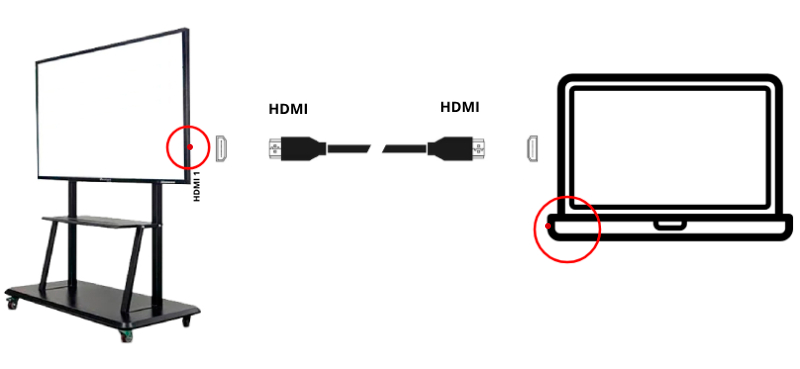
Connect the laptop to the HDMI-1 port located on the right side of the interactive screen.
- You can expand the options menu from either side of the screen.

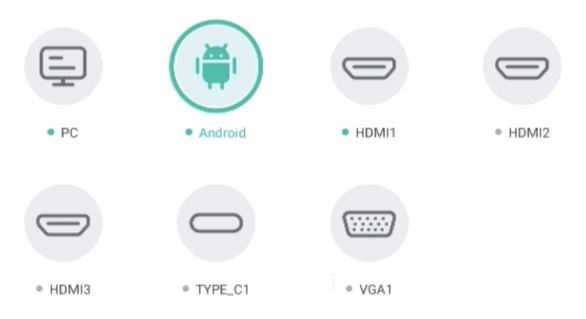
 Click on the Menu icon and select the HDMI 1 input. The
  green dot next to the input name highlights the inputs that are currently connected. The
  green icon indicates the input that is currently active.
Enable laptop touch functionality on the interactive screen
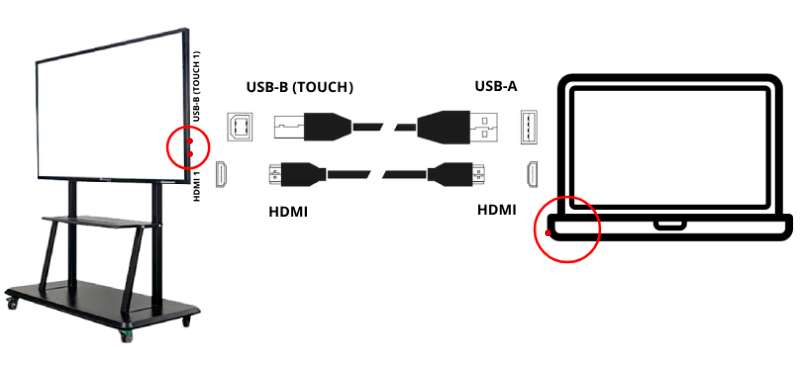
The interactive screen includes a USB Touch port, which enables panel interactivity with the laptop connected via HDMI. To achieve this, two connections must be made:
- HDMI: Connect the HDMI cable from the laptop to the HDMI-1 port on the screen to transmit the image. (see point 3 – USING THE SCREEN WITH A LAPTOP)
- USB Touch: Connect the USB cable with the Type-A end into the laptop and the Type-B (Touch) connector end into the panel to activate touch functionality. With these connections, the interactive screen works as a touch extension of the device, providing a smooth and precise experience.
- Repeat steps 4 and 5 from the previous section to display the laptop’s content on the interactive screen.
Note: HDMI and USB Type-B (Touch) cables must be requested at the building’s concierge office.